Have you ever needed an image to be a specific file size? Maybe a website has a strict 500KB limit for uploads, or an application requires profile pictures under 2MB. You know you can change the size, but how do you do it without turning your crisp photo into a blurry mess?
We specialize in this exact challenge: giving you precise control over your image’s file size while preserving as much quality as possible. This guide will break down the core concepts so you can use our tool like a pro.
The Two Levers of Image Size: Resolution vs. Compression
Think of your image’s file size as being controlled by two main levers:
- Resolution (Dimensions in pixels): This is the actual width and height of your image (e.g., 4000x3000px). More pixels mean more detail and a larger file size.
- Compression (The “Quality” Slider): This is how much the image data is squeezed down. High compression (low quality) creates a small file but can introduce artifacts; low compression (high quality) keeps the image clean but results in a larger file.
To hit a specific target KB size, you’ll need to adjust one or both of these levers. Let’s explore the two most common scenarios.
Scenario 1: You Need to Increase Your Image’s File Size
Let’s say you have a 150KB image, but you need it to be around 1.5MB (roughly 10x larger) for a high-quality print project. How do you get there?
The Key Insight: To significantly increase file size, you must increase the resolution.
Simply increasing the “quality” compression setting won’t create new pixel data. It will just save the existing data with less compression, which might only get you from 150KB to 300KB—not the 10x boost you need.
Your Action Plan on Resizeimage.io:
- Use the “Resize” Feature: Enter a larger width and height. A good rule of thumb is that to double the file size, you need to increase the resolution by about 1.4x (because file size is roughly proportional to the square of the resolution). To get a 10x increase, you’ll likely need to triple the resolution or more.
- Example: To go from 150KB to 1.5MB, try increasing a 1000x1000px image to 3000x3000px.
- By default Quality is set to 100%: When upscaling, we auto set the compression/quality slider to maximum (100%). Our tool uses advanced algorithms to add pixels intelligently, preserving clarity and sharpness as much as possible.
Why This Works: By increasing the resolution, you are creating a canvas with more pixels. When you save this new, larger image with minimal compression, the file size naturally increases dramatically to accommodate all that new visual information.
Scenario 2: You Need to Decrease Your Image File Size
This is the more common scenario. You have a 3MB photo from your camera and need it to be 300KB for a website.
The Key Insight: To decrease file size, you can often rely on compression alone, unless you need an extreme reduction.
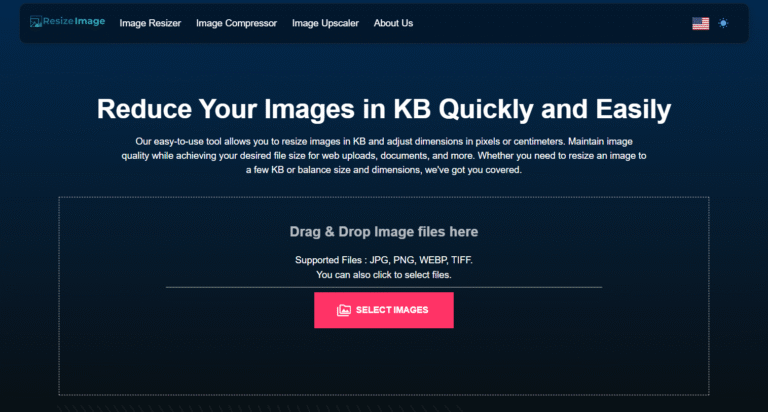
Your Action Plan on :
- First, Try the “Quality” Slider: This is your smoothest and most effective tool. Simply slide the quality down until you hit your target file size. Our smart compression ensures that visual quality remains high even at lower file sizes. You can often achieve a 70-90% reduction (e.g., 3MB to 600KB) without needing to touch the resolution at all.
- Only Resize (Reduce Resolution) for Extreme Reductions: If you need a reduction of more than 90% (e.g., 3MB to under 300KB), then it’s time to also adjust the resolution.
- Example: To get a 3MB image down to 250KB, you would:
- First, reduce the dimensions (e.g., from 4000px wide to 1500px wide).
- Again, the quality is set to 100%.
- Example: To get a 3MB image down to 250KB, you would:
Why This Works: Compression reduces file size by finding and simplifying redundant image data. For moderate reductions, this is enough. For extreme reductions, lowering the resolution is necessary because you are fundamentally removing pixel data, which is the most direct way to shrink the file.
Your Quick-Cheat Sheet for resizeimage.io
| Your Goal | Primary Tool to Use | How? |
|---|---|---|
| Increase file size significantly (e.g., 2x or more) | Resize (Increase Resolution) | 100% Quality will be preserved |
| Decrease file size moderately (e.g., by less than 90%) | Compression (Quality Slider) | Adjust the slider until you hit your target KB. Or manually change the preset image kb target. No need to change resolution. |
| Decrease file size drastically (e.g., by over 90%, eg 95%) | Resize (Decrease Resolution) | Combine with the decreasing resolution to half the original size and find the perfect balance. |
Conclusion: Precision is Power
Understanding the dance between resolution and compression is the secret to mastering your image file sizes. With resizeimage.io, you have a powerful and intuitive tool that puts both levers directly in your hands.
Whether you’re scaling up for a banner or crunching down for a thumbnail, you can now approach the task with confidence, knowing exactly how to achieve your target KB while keeping your images looking their best.
Ready to take control? Head over to resizeimage.io and try it for yourself